Yaki Onigiri Grilled Rice Balls Recipe
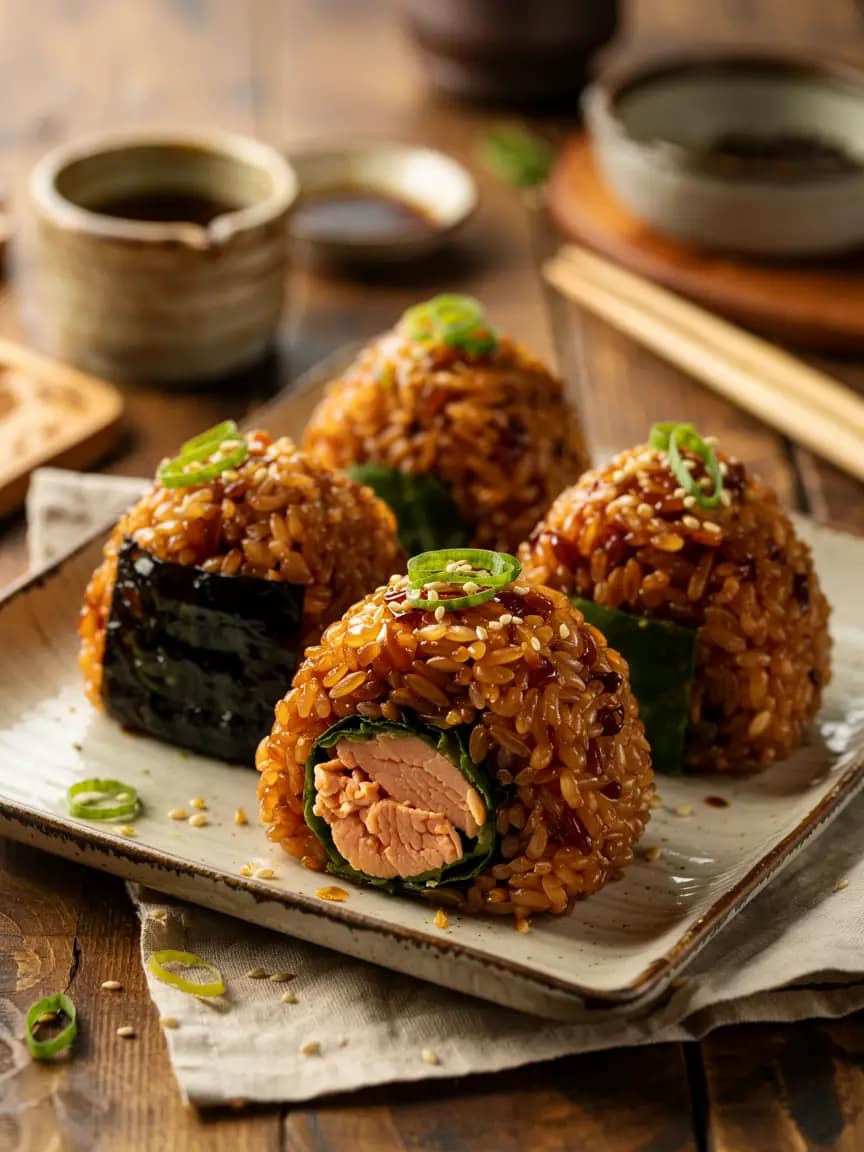
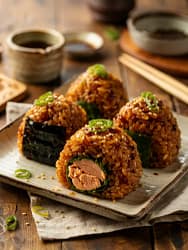
Imagine a humble ball of steamed rice kissed by fire, its surface crisped to a golden char and lacquered with a glossy soy glaze — that’s the magic of yaki onigiri (grilled rice balls). As a professional chef who lives for comfort food with elegant technique, I’ll walk you through everything you need to know to make restaurant-quality yaki onigiri at home: from choosing the right rice and shaping technique, to multiple grilling methods, two lacquered glaze options, savory fillings, plating suggestions, storage, troubleshooting, and creative variations. This is a full, in-depth recipe and guide so you can confidently make yaki onigiri anytime.
What is Yaki Onigiri?
Yaki onigiri translates literally to “grilled rice ball.” Unlike plain onigiri, which is often soft and wrapped in nori, yaki onigiri are typically grilled until the exterior crisps and becomes slightly charred, then brushed with a savory sauce (tare) like soy-sauce–mirin or miso-based glaze. The result is textural contrast — crunchy exterior, pillowy interior — with deep umami flavors. Yaki onigiri are common as snacks, accompaniment to soups, or as part of a bento.
Why this Yaki Onigiri Grilled Rice Balls Recipe?
- It’s written for home cooks and serious home chefs alike — clear technique and professional tips.
- You’ll learn two glaze options (classic soy-mirin tare and a miso glaze) and several grilling methods (charcoal, gas, stovetop, broiler).
- Includes variations with fillings (umeboshi, salmon, tuna mayo), vegan/ GF options, storage, and plating/pairing ideas.
- Step-by-step troubleshooting to ensure success every time.
Ingredients (makes 6 medium rice balls)
Rice & base (for 6 medium yaki onigiri — about 12–14 cm / 5–5.5 in total diameter combined)
- 2 cups (360 g) Japanese short-grain rice (sushi rice / Japonica) — rinsed until water runs almost clear
- 2 1/4 cups (540 ml) water (adjust to your rice cooker/rice type)
- 1/2 teaspoon fine sea salt (for seasoning rice, optional)
- 1–2 teaspoons neutral oil or sesame oil (for grilling surface, optional)
Classic soy-mirin tare (for brushing)
- 3 tablespoons soy sauce (use light / regular depending on salt preference)
- 2 tablespoons mirin
- 1 tablespoon sake (optional but recommended)
- 1 tablespoon brown sugar or honey (adjust to taste)
Miso glaze (alternative)
- 2 tablespoons white miso (shiro miso)
- 1 tablespoon mirin
- 1 tablespoon sake or water
- 1 teaspoon sugar or maple syrup
- Optional: 1/2 teaspoon toasted sesame oil
Fillings (optional; pick one or mix and match)
- 1/4 cup flaked cooked salmon, seasoned
- 2 tablespoons umeboshi paste (sour plum)
- 1/3 cup canned tuna mixed with 1 tablespoon mayonnaise and a little soy sauce (tuna mayo)
- Cooked kombu or pickled veggies for vegan option
Finish & garnish
- Toasted sesame seeds
- Nori strips or sheets (optional; wrap halfway around or serve on side)
- Scallions, finely chopped (optional)
Notes on quantities: This batch yields roughly six medium-sized yaki onigiri. Scale ingredients proportionally.
Equipment
- Rice cooker (recommended) or heavy-bottomed pot with tight-fitting lid
- Bowl and fine mesh sieve (for rinsing rice)
- Wooden or plastic rice paddle (shamoji) — avoid metal to prevent damaging rice texture
- Small bowl of water mixed with a pinch of salt (for shaping)
- Griddle, cast-iron skillet, or nonstick pan — OR — charcoal/gas grill or broiler
- Small brush for glazing
- Heatproof spatula or tongs
Step-by-step Preparation
1. Cook the Rice Properly (foundation of success)
Perfect yaki onigiri starts with perfectly cooked rice. Short-grain Japanese rice has the right balance of stickiness and structure.
- Measure 2 cups rice and place in a large bowl. Rinse under cold water, gently swishing with your hand. Drain and repeat 3–5 times until water runs almost clear but not perfectly transparent — some starch should remain to bind the rice.
- Drain thoroughly for 10–15 minutes. This improves texture.
- Combine rice and 2 1/4 cups water in the rice cooker or pot. Let sit 30 minutes (optional but recommended — it hydrates grains evenly).
- Cook per rice cooker instructions. If using stovetop: bring to a boil, reduce to lowest heat, cover, and cook 12–14 minutes. Turn off and rest covered 10–12 minutes.
- Transfer rice to a wide bowl, fluff gently with a paddle. If you like, fold in 1/2 teaspoon salt for subtle seasoning.
Pro tip: Do not over-mix — handle gently so rice remains slightly sticky and glossy.
2. Prepare Fillings & Glazes
While rice rests:
Classic tare: Combine soy sauce, mirin, sake, and brown sugar in a small saucepan. Bring to a gentle simmer, stir until sugar dissolves. Reduce heat to low until slightly thickened (1–2 minutes). Cool to room temp.
Miso glaze: Whisk miso with mirin, sake (or water), and sugar until smooth.
Fillings: Flake cooked salmon or mix canned tuna with mayo and a dash of soy. For umeboshi, mash the preserved plum into a paste.
3. Shape the Onigiri (traditional triangle or round)
Shaping is simple with practice.
- Wet your hands with salted water (this prevents rice from sticking). Keep a small bowl of water at your side.
- Scoop about 3/4 to 1 cup rice into your cupped hand. If adding filling, make an indentation, place a teaspoon to a tablespoon of filling, and cover with rice.
- Gently press into a triangle, oval, or ball. Use firm but gentle pressure — you want compactness, not brick-hard density. Rotate and press until shape holds.
- Repeat to form 6 onigiri. Keep them covered with a damp cloth if not grilling immediately.
Size guide: Each onigiri should weigh around 90–110 g (3–4 oz) for a medium ball.
4. Grill Methods — Choose Your Weapon
You can grill yaki onigiri many ways. Each method offers a different flavor profile.
Charcoal Grill (best for authentic smoky flavor)
- Preheat to medium-high. Oil grate lightly. Place onigiri directly on grate. Grill 2–3 minutes per side until golden and charred in spots. Brush with tare, grill another 30–60 seconds each side, repeating to build glaze layers.
Gas Grill
- Similar to charcoal. Medium heat, careful not to burn. Close lid as needed.
Cast-Iron Skillet / Grill Pan (stovetop method — easiest at home)
- Heat a dry cast-iron or nonstick pan over medium-high. Brush pan with a little oil or sesame oil. Place onigiri and press gently with spatula to maximize contact. Cook 3–4 minutes each side until crust forms. Brush glaze and cook 30–60 seconds per side repeating 1–2 times.
Broiler (oven)
- Line a sheet with foil. Preheat broiler to high. Place onigiri on pan, broil 2–3 minutes, rotate and broil until surface puffs and browns. Brush glaze and broil briefly to set.
Pro tip: For consistent crust, press onigiri lightly during first minute of contact to increase surface contact and crisping.
5. Glazing & Finishing
- After the initial crisp forms, brush the top surface with tare or miso glaze using a pastry brush. Don’t be shy — the glaze caramelizes and gives flavor.
- Flip and glaze the other side. Repeat 1–2 times to build layers and a glossy finish.
- If using nori, either wrap a strip around once finished or serve nori on the side to avoid sogginess.
- Sprinkle toasted sesame seeds or sliced scallions for contrast.
Tips for the Best Yaki Onigiri
- Rice choice matters: Use Japanese short-grain rice. Medium- or long-grain will produce crumbly results.
- Salt your shaping water: A lightly salted hand helps season from the inside out.
- Don’t over-press: Compact enough to hold shape, not so dense the rice becomes gummy.
- Glaze control: If tare is too watery, simmer to reduce. If too thick, thin with a little sake or water.
- Layer flavors: Brush glaze in two or three thin coats rather than one heavy coat. It caramelizes more evenly and avoids burning.
- For grill marks: Use a hot, dry pan/grill and resist flipping too often — you want one good sear per side.
- Make ahead: You can shape onigiri and refrigerate up to 24 hours (covered). Bring to room temp before grilling for even heating.
Variations & Flavor Ideas
Classic soy-mirin (salt-free) — the base recipe.
Miso butter yaki onigiri: Mix softened butter with a little white miso, brush onto grilled rice at the end. Luxurious and savory.
Spicy tare: Add 1 teaspoon gochujang or sriracha to tare for subtle heat.
Cheesy yaki onigiri: Place a slice of melting cheese on top after glazing and broil briefly. Delicious fusion.
Vegan miso: Use mirin and brown sugar in miso glaze; avoid dashi if it’s fish-based.
Furikake crust: After brushing tare, press onigiri into furikake (rice seasoning) before last sear. Great texture and color.
Stuffed variants: Salmon, umeboshi, kombu, pickled plum, pickled takuan, or natto (fermented soybeans — adventurous!).
Serving Suggestions & Pairings
Yaki onigiri are versatile:
- Serve with miso soup and a small salad for a light meal.
- Pair with grilled fish and pickles for a classic washoku (Japanese meal).
- For picnic or bento, wrap nori separately and include soy pickles.
- Drinks: hot green tea or cold barley tea (mugicha) are ideal. For an adult pairing, light lager or dry sake complements the umami.
Plating idea: Place three onigiri on a simple rectangular plate, garnish with scallions and sesame seeds, and add a small ramekin of leftover tare for dipping.
Storage & Reheating
- Short term: Store in an airtight container in the fridge up to 24 hours. Glaze may make them a little softer. Re-crisp in a preheated skillet or under broiler for 2–3 minutes per side.
- Freezing: Freeze un-grilled or grilled onigiri individually wrapped in plastic, then in a freezer bag up to 1 month. Thaw and reheat in skillet or oven.
- Safety tip: Refrigerate within 2 hours of making. Reheat to steaming hot if rice was stored.
Troubleshooting (common issues & fixes)
Rice too dry / falling apart: You likely used the wrong rice or undercooked. Use short-grain rice, and ensure proper water ratio. When shaping, keep hands moist.
Onigiri too dense/gummy: Over-compressing causes gummy texture. Press gently — enough to hold the shape.
Surface burns before interior warms: Grill over medium heat, not high. If pan is smoking, lower the heat and move onigiri to cooler part of pan.
Glaze burns quickly: Reduce heat, brush thinner coats, or finish under lower heat. Sugar-containing glazes caramelize fast.
No crisp exterior: Ensure pan/grill is sufficiently hot and press lightly to build contact. Using a small amount of oil improves browning.
Frequently Asked Questions (FAQ)
Q: Can I use leftover rice?
A: Yes — day-old refrigerated rice can work well because it’s firmer. Wet hands and shape carefully. Re-crisp longer in the pan.
Q: Is yaki onigiri gluten-free?
A: The rice and many fillings are gluten-free, but soy sauce contains gluten. Use tamari or a certified gluten-free soy sauce for a GF version.
Q: How do I prevent nori from becoming soggy?
A: Wrap nori around the onigiri just before serving, or serve it separately so diners can wrap as they go.
Q: Can I deep-fry yaki onigiri?
A: Yes — there’s a Japanese variant called “agedashi onigiri” where onigiri is lightly fried. It’s delicious but not traditional yaki onigiri.
Nutrition Snapshot (approximate, per medium onigiri without filling)
- Calories: ~220–260 kcal
- Carbs: ~46–55 g
- Protein: ~4–6 g
- Fat: ~1–3 g (varies if butter or sesame oil used)
Nutrition varies with fillings, glaze, and portion size.
Photo & Presentation Tips (for bloggers & foodies)
- Use natural side lighting to show glossy glaze and char marks.
- Capture texture close-up: a 45° angle works well to show crispy exterior and soft interior.
- Garnish sparingly — too much distracts from the beautiful simplicity.
- If photographing nori, add it last to avoid shine and sogginess.
Chef’s Final Notes & Variations I Love
- My go-to is a soy-mirin tare brushed twice, with a light sprinkle of sesame and half-wrapped nori — classic and addictive.
- For a richer, slightly decadent twist, try miso-butter — brush miso glaze, top with a pat of miso-butter, and briefly pan-sear until bubbling.
- For party-friendly appetizer bites, make smaller onigiri (2–3 bites), skewer them, and serve with a small bowl of tare for dipping.
Yaki Onigiri Grilled Rice Balls Recipe (Concise Recipe Card)
Yield: 6 medium yaki onigiri
Prep time: 20–30 minutes (plus rice cooking/resting time)
Cook time: 10–15 minutes (grilling and glazing)
Ingredients: See ingredient list above.
Method summary: Cook and rest short-grain rice → prepare glaze/fillings → shape rice balls → grill (charcoal/pan/broiler) until crust forms → brush glaze and repeat → serve hot with nori, sesame, scallions.
Closing — Make Yaki Onigiri Your Way
Yaki onigiri are deceptively simple but deeply satisfying. With attention to rice texture, gentle shaping, and layered glazing, you’ll have a snack or side that’s comfortingly familiar yet full of complex umami. Try the classic Yaki Onigiri Grilled Rice Balls Recipe once, then make it your own with fillings and glazes that speak to your palate.
Yaki Onigiri Grilled Rice Balls Recipe
Ingredients
Rice & base
- 2 cups 360 g Japanese short-grain rice, rinsed
- 2 1/4 cups 540 ml water
- 1/2 teaspoon fine sea salt optional, for seasoning rice
- 1 –2 teaspoons neutral oil or sesame oil for grilling surface; optional
Classic soy-mirin tare (glaze)
- 3 tablespoons soy sauce
- 2 tablespoons mirin
- 1 tablespoon sake optional
- 1 tablespoon brown sugar or honey
Miso glaze (alternative)
- 2 tablespoons white miso shiro miso
- 1 tablespoon mirin
- 1 tablespoon sake or water
- 1 teaspoon sugar or maple syrup
- 1/2 teaspoon toasted sesame oil optional
Fillings (optional — pick one)
- 1/4 cup flaked cooked salmon
- 2 tablespoons umeboshi paste
- 1/3 cup canned tuna + 1 tbsp mayonnaise + dash of soy sauce
- Cooked kombu or pickled vegetables vegan
Finish & garnish
- Toasted sesame seeds
- Nori sheets or strips optional
- Finely sliced scallions optional
Instructions
Cook the rice (foundation)
- Rinse 2 cups short-grain rice under cold water, gently swishing with your hand. Drain and repeat until water runs almost clear (3–5 rinses).
- Drain rice 10–15 minutes to remove excess surface water.
- Combine rice and 2 1/4 cups water in a rice cooker or heavy pot. Let sit 20–30 minutes (optional).
- Cook per your rice cooker, or stovetop: bring to a boil, reduce to low, cover and simmer 12–14 minutes. Turn off heat and rest, covered, 10–12 minutes.
- Transfer rice to a wide bowl and gently fluff with a paddle. If using, fold in 1/2 tsp sea salt.
Prepare glazes & fillings while rice rests
- Classic tare: Combine soy, mirin, sake, and brown sugar in a small saucepan. Simmer gently until sugar dissolves and mixture thickens slightly (1–2 minutes). Cool.
- Miso glaze: Whisk miso, mirin, sake (or water), and sugar until smooth. Thin with a little water if too thick.
- Prepare any fillings (flake salmon, mash umeboshi, mix tuna mayo).
Shape the onigiri
- Keep a small bowl of water with a pinch of salt nearby. Wet your hands.
- Scoop 3/4–1 cup rice into your palm. If adding filling, make a small indentation, place 1 tsp–1 tbsp filling, then cover with rice.
- Gently press to form a compact triangle, oval, or round ball — firm enough to hold shape but not overly compressed. Repeat to make 6 medium onigiri. Keep shaped rice covered with a damp cloth until grilling.
Grill and glaze
- Choose your method (cast-iron pan, grill, or broiler): preheat to medium-high. Lightly oil the grate or pan if using.
- Place onigiri on the hot surface. Press gently with a spatula for the first minute to maximize contact. Grill 3–4 minutes per side until a golden crust forms and there are charred spots.
- Brush the hot surfaces with tare or miso glaze using a small brush. Flip and glaze the other side. Repeat 1–2 thin coats, allowing glaze to caramelize but not burn.
- Remove from heat. Optionally wrap a strip of nori around each onigiri just before serving, and sprinkle with sesame seeds or scallions.
Notes
- Rice choice: Use Japanese short-grain (sushi) rice for ideal stickiness and texture. Long-grain rice will not hold as well.
- Shaping: Wet, salted hands prevent sticking and season the rice. Press gently — over-compressing yields gummy texture.
- Glazing: Apply thin coats of glaze and build layers; heavy single coats can burn. If glaze thickens in the pan, thin with a splash of sake or water.
- Nori: Add nori just before serving to avoid sogginess. Alternatively serve nori separately.
- Make-ahead: Shape onigiri and refrigerate up to 24 hours (covered). Bring to room temperature before grilling.
- Freezing: Wrap each onigiri tightly in plastic and freeze (up to 1 month). Reheat from frozen in a skillet or oven until hot throughout.
- Dietary swaps: Use tamari for gluten-free; miso glaze can be made vegan by ensuring mirin/sake are vegan and avoiding fish dashi.
- Variations: Miso-butter finish (pat of miso-butter on hot onigiri), furikake crust (press glaze-brushed rice into furikake), cheesy onigiri (add melting cheese and briefly broil).