Raw Vegan Brownies Recipe
If you’ve been searching for a decadent dessert that’s entirely plant-based, has no baking, and still delivers the deep, fudgy satisfaction of a classic brownie — welcome. I’m a professional chef who’s spent years coaxing flavor and texture from whole foods, and in this post I’ll walk you through a complete, chef-tested Raw Vegan Brownies Recipe that’s reliable, flexible, and endlessly adaptable. Expect precise measurements, professional tips, troubleshooting, creative variations, plating and pairing ideas, and smart storage advice. No shortcuts. No baking. Pure chocolatey joy.
Why a raw vegan brownie?
A raw vegan brownie is built from ingredients that are not heated above roughly 115–120°F (46–49°C), preserving enzymes and delivering a bright, nutty flavor profile. The dessert relies on whole, minimally processed components—often dates, nuts, cacao, and natural sweeteners—to recreate the dense, fudgy texture of a baked brownie without an oven.
Reasons to love this version:
- Fast: minimal prep, no oven time.
- Healthy-ish: whole food ingredients, no refined flours or sugars.
- Flexible: easy to transform into nut-free, keto-ish, or protein-boosted versions.
- Travel-friendly: great for picnics and potlucks (with cool storage).
What this post covers
You’ll get:
- A chef’s-level, foolproof Raw Vegan Brownies Recipe (measurements included)
- Equipment and ingredient notes so your first batch succeeds
- Detailed step-by-step instructions and plating tips
- Variations (nut-free, mocha, salted caramel, kid-friendly)
- Serving suggestions, pairings, and storage
- Troubleshooting and frequently asked questions
Chef’s Raw Vegan Brownies Recipe (Fudgy Date & Walnut Base)
Yields: 12 generous squares
Time: 20–30 minutes active (plus chilling)
Skill level: Beginner-friendly with chef tips
Ingredients — Brownie base
- 2 cups (approx. 300 g) pitted Medjool dates — soft and moist (if firm, soak 10–15 minutes in warm water, drain)
- 1 1/4 cups (150 g) raw walnuts (or pecans)
- 1/2 cup (60 g) raw almonds — optional for extra body (or increase walnuts to 1 3/4 cups)
- 1/2 cup (50 g) raw cacao powder (not Dutch-processed) — for intense chocolate notes
- 1/4 tsp fine sea salt (plus extra for finishing)
- 2 tbsp (15 g) chia seeds or flax meal (optional — helps texture)
- 2 tbsp (30 ml) neutral oil (mild coconut oil, avocado oil, or light olive oil) — optional, adds sheen and mouthfeel
- 1 tsp pure vanilla extract or the seeds of 1/2 vanilla bean (optional)
- 1–2 tbsp plant milk (almond, oat, or cashew), only if mixture is too dry
Optional mix-ins / toppings
- 1/2 cup dark chocolate chips (vegan) or chopped 70% chocolate
- 1/4 cup cacao nibs for crunch
- 1/4 cup unsweetened shredded coconut
- 1/4 cup toasted chopped hazelnuts or extra walnuts
- flaky sea salt for finishing
Equipment you’ll need (simple, professional choices)
- High-powered food processor (best) or strong blender — for even consistency
- Spatula — for scraping sides
- 8×8-inch square pan or small loaf pan — lined with parchment for easy removal
- Measuring cups and spoons or a kitchen scale (recommended)
- Small bowl for soaking dates (if needed)
- Sharp knife for slicing squares
Pro tip: using a kitchen scale gives repeatable texture — I weigh dates and nuts in grams when testing.
Step-by-step method (chef’s approach)
- Prep the dates (only if they’re firm). If your Medjools are cakey or dry, soak them in warm (not hot) water for 10–15 minutes. Drain completely and pat dry. Texture matters: tacky, soft dates are ideal.
- Toast the nuts (optional but recommended). For a deeper, more complex flavor, toast walnuts and almonds in a dry skillet over medium heat for 3–5 minutes until fragrant and starting to color — or roast at 325°F/160°C for 8–10 minutes. Cool before processing. This step is technically raw if you avoid toasting, so skip if you must adhere strictly to raw diets.
- Pulse the nuts. Add the walnuts and almonds to your food processor and pulse until they’re coarsely ground (no more than sandy). You want small bits — not nut butter.
- Add dates and binders. Add the pitted dates, cacao powder, chia/flax (if using), salt, vanilla, and oil. Process until the mixture pulls together into a sticky, slightly chunky dough. Scrape the sides as needed. If it’s too dry, add 1 teaspoon of plant milk at a time until the texture holds together when pinched.
- Taste and adjust. Taste a small piece. If it’s not chocolatey enough, add up to 1 tbsp more cacao. If you want sweeter, pulse in a couple of extra dates (or a tablespoon of maple syrup, though this drifts from “virtually raw” purism).
- Add mix-ins. Fold in chocolate chips, cacao nibs, or toasted hazelnuts by hand, or pulse very briefly to distribute.
- Press into pan. Transfer the mixture into the parchment-lined pan. Press firmly and evenly with a spatula, or use a second sheet of parchment to press the surface flat. Firm compression eliminates air pockets and gives a dense, brownie-like bite.
- Chill. Refrigerate for at least 30–60 minutes to set. For firmer slices and cleaner cuts, freeze for 15–20 minutes, then slice.
- Slice and serve. Use a sharp knife, wiped clean between cuts, to get tidy squares. Sprinkle with flaky sea salt and serve chilled or at cool room temperature.
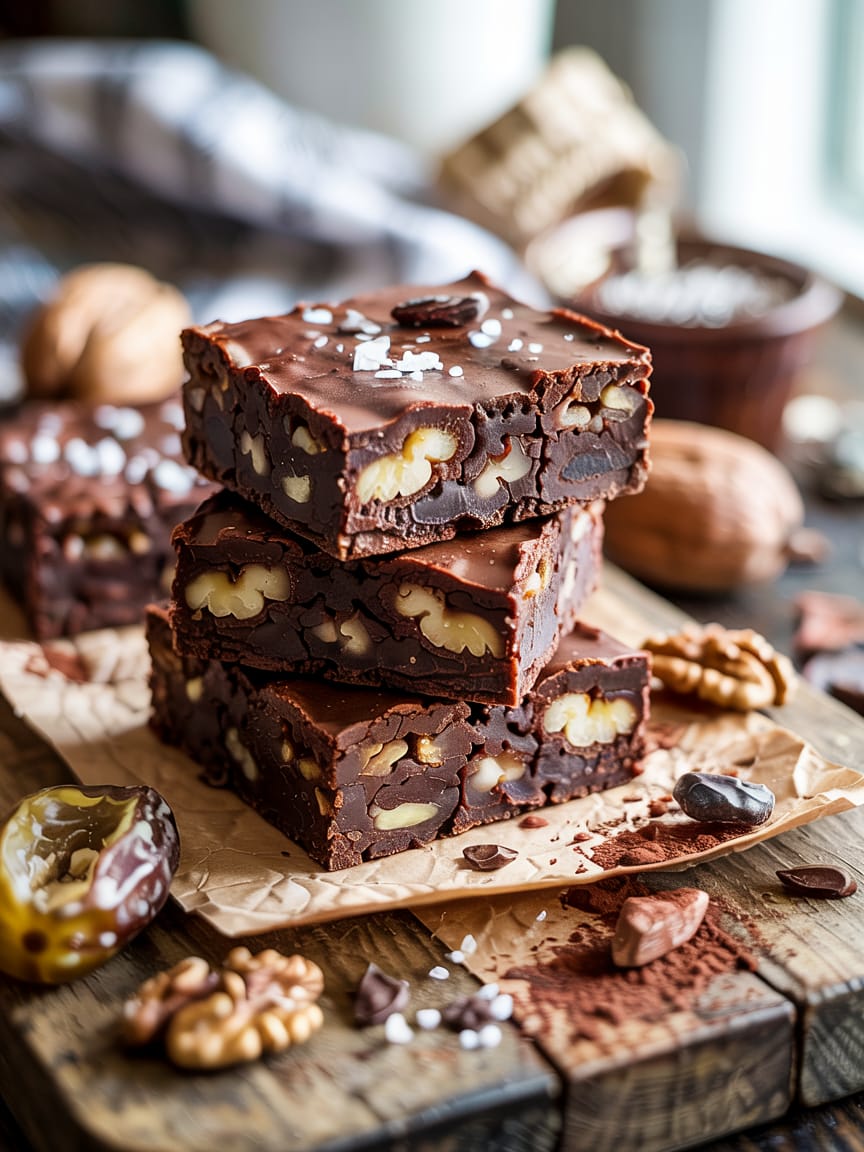
Texture and flavor notes (what to expect)
This Raw Vegan Brownies Recipe yields a dense, chewy, and deeply chocolatey brownie with a subtle nuttiness from walnuts and almonds. The dates provide sweetness and stickiness; cacao powder gives the bitter chocolate backbone. If you include a layer of melted vegan chocolate, you’ll get a glossy top and extra snap.
If your brownie is too crumbly: it’s too dry. Add a small teaspoon of neutral oil or one more date and re-process. If it’s too sticky to slice: chill longer or briefly freeze.
Variations — make it yours
Below are chef-tested transformations to suit diets, flavors, and occasions:
1. Nut-free / allergy-friendly
Replace nuts with 2 cups sunflower seeds (hulled) or pumpkin seeds. Toast lightly for flavor, then follow the same process. Add 1 tbsp sunflower seed butter if you need extra binding.
2. Keto-friendly-ish
Use a blend of almond flour (3/4 cup) and almond butter (3/4 cup), replace dates with 1/3 cup powdered erythritol + 1/4 cup unsweetened applesauce or 3 tbsp MCT oil — note: texture and sweetness will differ. This strays from the classic raw vegan approach.
3. Mocha Espresso Brownies
Add 2 tsp instant espresso powder to the base and melt 1/3 cup dark chocolate with 1 tsp espresso for a mocha glaze. Coffee amplifies chocolate richness.
4. Salted Caramel Layer
Make a raw cashew caramel: blend 1 cup soaked cashews + 3–4 tbsp maple syrup + 1 tbsp lemon juice + pinch of salt + 2–3 tbsp water until very smooth. Spread a thin layer on pressed base, chill, then top with chocolate.
5. Mint Chocolate
Add 1/2 tsp peppermint extract and fold in 1/3 cup dark chips. Finish with crushed peppermint candy or freeze-dried mint powder.
6. Protein Boost
Add 2 scoops unflavored or chocolate plant protein powder and an extra tablespoon of plant milk. Reduce nuts slightly to keep chew.
Toppings and presentation
Presentation elevates perception. Try these finishing touches:
- Lightly dust with sifted cacao powder.
- Drizzle melted vegan chocolate (heat gently in a double boiler or over warm water).
- Sprinkle with flaky sea salt, cacao nibs, or toasted coconut.
- Press a single walnut half or raspberry on top of each square for a professional look.
Plating idea: serve a square on a small dessert plate with a quenelle of coconut whipped cream and a scattering of fresh berries. For a rustic serving, stack two squares and insert a mint sprig.
Pairings — beverages and accompaniments
- Espresso or strong coffee — contrasts richness with acidity.
- Oat milk latte or chai — gentle, warming spices pair beautifully.
- Full-bodied red wine (e.g., Zinfandel or Merlot) — if you serve alcohol.
- Fresh berries or a bright citrus salad — balance the richness.
- Coconut cream or cashew cream — softens intensity and adds silk.
Storage, freezing, and make-ahead
- Refrigerator: Keep in an airtight container for 7–10 days. Chilled brownies hold best.
- Freezer: Layer squares in parchment, store in a freezer-safe container for up to 3 months. Thaw in the fridge for 30–60 minutes before serving.
- Make-ahead: Make the base a day or two ahead; add toppings just before serving for the freshest texture.
Chef tip: slice while slightly chilled for clean edges. Wipe your knife between cuts with a warmed towel for a perfect finish.
Sourcing ingredients: what to buy and why it matters
- Medjool dates: Choose soft, plump dates for optimal moisture and sweetness. Cheap, dry dates will require soaking and can change texture.
- Raw cacao powder: True cacao (not Dutch-processed) gives complexity and a slightly bitter edge. Avoid overly sweet “cocoa mixes.”
- Nuts: Raw, unsalted nuts are best. If you buy in bulk, store in the fridge to prevent rancidity.
- Cacao nibs: For crunch and an unfussy garnish — look for unsweetened nibs.
- Vanilla: Pure vanilla extract or vanilla bean is preferable to artificial flavoring.
If you can, buy organic dates and cacao for cleaner flavor and fewer additives.
Nutrition & dietary considerations
This dessert is plant-based, gluten-free, and — depending on ingredients — can be nut-free. However, it’s calorie-dense due to the nuts and dates. Enjoy in moderation as a treat. If you need precise macronutrient counts, plug your exact ingredients and portion sizes into a nutrition calculator. (I prefer weighing servings for reliable portion control.)
Troubleshooting — common issues and fixes
- Brownies are crumbly and fall apart. Likely too dry. Add a small date or 1 tsp neutral oil, then reprocess and press again.
- Mixture is a sticky paste and clogs the processor. Add 1–2 tbsp finely ground nuts or a tablespoon of cacao to absorb excess moisture, or chill the bowl for 10 minutes and try again.
- Bitter aftertaste. Could be too much raw cacao. Reduce by 1–2 tbsp next time or add a touch more sweetener (extra date or a drizzle of maple).
- Slices are messy. Chill longer, then slice with a warmed, dry knife and wipe between cuts.
Frequently Asked Questions (FAQ)
Q: Are raw brownies actually raw if I toast nuts?
A: Technically, no — toasting breaks the “raw” rule. If you strictly follow raw cuisine, skip toasting. I recommend light toasting for flavor unless the diet forbids it.
Q: Can I use another sweetener instead of dates?
A: Dates are ideal because they bind and sweeten. Maple syrup, agave, or brown rice syrup can be used but will change texture and make the mixture stickier — reduce added liquid elsewhere.
Q: How do I get a fudgier texture?
A: Increase the ratio of dates to nuts slightly, or add a teaspoon of melted (but cooled) coconut oil to increase softness and sheen.
Q: Can I make this in a blender?
A: Only if it’s very powerful and you work in small batches. Food processors are best because they handle sticky, thick doughs more reliably.
Chef’s final tips for knockout results
- Use quality dates — this variable affects everything. Medjools are my go-to.
- Control moisture — add plant milk sparingly; you can always add more, but you can’t easily remove it.
- Press firmly — good compression equals clean, dense bites.
- Finish with contrast — salt, texture (nibs), or acid (berries) makes chocolate sing.
- Scale confidently — double the recipe for parties; press into a 9×13-inch pan and chill longer.
A few creative menu ideas using this Raw Vegan Brownies Recipe
- Mini brownie tartlets: Press the base into small tart pans and top with a dollop of raw cashew caramel and berry.
- Brownie ice cream sandwiches: Place a scoop of banana or coconut ice cream between two chilled squares.
- Brownie crumb crust: Pulse extra brownies and press into a pie tin as a crust for raw cheesecake.
Closing — why you’ll make this again
The charm of this Raw Vegan Brownies Recipe lies in its simplicity and adaptability. With a few pantry staples and a good food processor, you can make a dessert that looks and tastes indulgent while being entirely plant-based and no-bake. Whether you’re serving guests, packing lunchbox treats, or craving a chocolate fix that’s quick and reliable, this recipe is a keeper.
Raw Vegan Brownies Recipe
Ingredients
For the Brownie Base
- 2 cups 300 g soft Medjool dates, pitted
- 1 1/4 cups 150 g raw walnuts
- 1/2 cup 60 g raw almonds (or increase walnuts to 1 3/4 cups total)
- 1/2 cup 50 g raw cacao powder
- 1/4 tsp fine sea salt
- 2 tbsp chia seeds or flax meal optional
- 2 tbsp coconut oil or avocado oil optional, for extra creaminess
- 1 tsp pure vanilla extract optional
- 1 –2 tbsp plant milk only if mixture is too dry
Optional Mix-Ins
- 1/2 cup vegan dark chocolate chips or chopped dark chocolate
- 1/4 cup cacao nibs
- 1/4 cup shredded coconut
- Flaky sea salt for topping
Instructions
Prepare the Dates:
- If your dates are firm or dry, soak them in warm water for 10–15 minutes. Drain and pat dry.
Process the Nuts:
- Add walnuts and almonds to a food processor. Pulse until coarsely ground—avoid turning them into nut butter.
Add Remaining Ingredients:
- Add dates, cacao powder, salt, optional chia/flax, vanilla, and oil. Process until a sticky dough forms. If too dry, add plant milk 1 tsp at a time.
Adjust Texture:
- Taste the dough and adjust sweetness or chocolate intensity as desired.
Add Mix-Ins (Optional):
- Fold in chocolate chips, coconut, nuts, or cacao nibs.
Press into Pan:
- Line an 8×8-inch pan with parchment. Firmly press the brownie mixture evenly into the pan using your hands or a second sheet of parchment.
Chill:
- Refrigerate for at least 30–60 minutes or freeze for 15–20 minutes to firm up.
Slice & Serve:
- Once chilled, cut into squares using a sharp knife. Top with flaky sea salt if desired.
Notes
- Storage: Keep brownies refrigerated for 7–10 days or freeze for up to 3 months.
- Texture Fix: Too dry? Add 1–2 more dates or 1 tsp oil. Too sticky? Add a spoon of ground nuts or cacao.
- Nut-Free Option: Replace nuts with sunflower or pumpkin seeds.
- Flavour Variations: Add espresso powder for mocha, peppermint extract for mint chocolate, or a cashew caramel layer for indulgence.
- Serving Suggestion: Serve chilled with coconut whipped cream or fresh berries.