Japanese Christmas Cake Recipe
There’s something undeniably magical about the Japanese Christmas Cake Recipe. With its pillowy soft sponge, sweet whipped cream frosting, and bright bursts of fresh strawberries, this cake embodies the festive spirit in a way that feels both elegant and whimsical. Unlike the heavy fruitcakes often associated with Western holidays, Japan’s beloved Christmas cake is light, airy, and decorated to perfection—making it a star centerpiece at holiday gatherings. In this comprehensive guide, I’ll share every detail you need to master this iconic Japanese treat, from selecting the best ingredients to decorating like a professional pastry chef. Whether you’re a seasoned baker or a curious home cook, you’ll find tips, tricks, and variations to ensure your cake shines under the holiday lights.
A Brief History of Japanese Christmas Cake
Long before the modern age of Instagram-worthy desserts, the Japanese Christmas cake emerged in post-war Japan as a symbol of celebration and prosperity. In the 1950s, western-style bakeries began introducing sponge cakes topped with whipped cream and strawberries—luxurious ingredients at the time—and the novelty quickly caught on. By the 1970s, “Christmas cake” had become synonymous with holiday cheer, and families nationwide queued for a slice on December 25th. Today, the Japanese Christmas Cake Recipe not only carries nostalgic appeal but also represents the artful fusion of European patisserie techniques and Japanese attention to detail.
Why This Recipe Works
- Lightness and Texture: The delicate sponge, achieved through precise egg foaming and gentle folding, ensures a melt-in-your-mouth experience.
- Balanced Sweetness: Unsweetened whipped cream keeps the cake from becoming cloying, while the natural tartness of strawberries adds brightness.
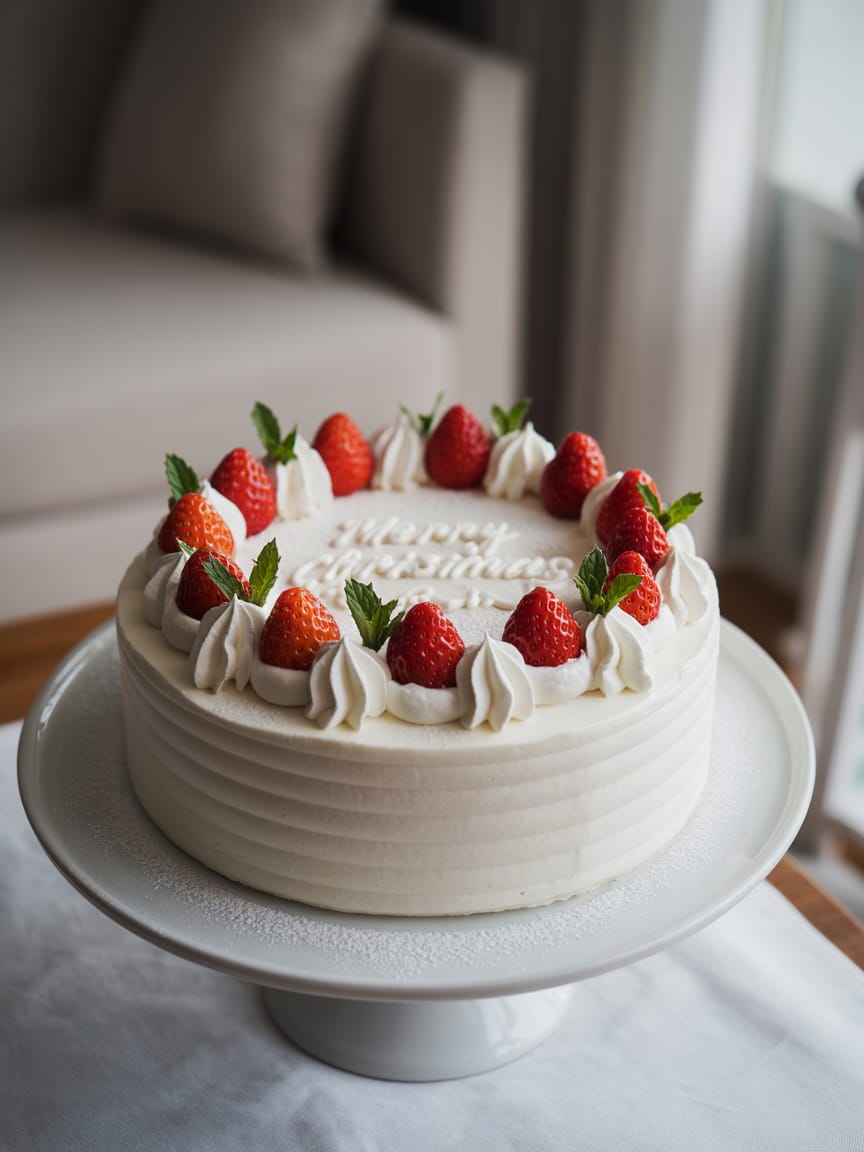
- Show-Stopping Presentation: Simple yet striking design—white cream contrasted with red berries—creates an elegant holiday centerpiece.
- Versatility: From classic strawberry layers to inventive variations (e.g., matcha, yuzu, or chocolate), this recipe lays the groundwork for creative adaptations.
Ingredients
Before you begin, gather the following high-quality ingredients. Precise measurements and quality selections are crucial for a flawless Japanese Christmas Cake Recipe.
Sponge Cake
- Eggs: 4 large, room temperature
- Granulated Sugar: 120 g (about ½ cup + 2 Tbsp)
- Cake Flour: 100 g (sifted)
- Cornstarch: 20 g (sifted)
- Unsalted Butter: 30 g (melted and slightly cooled)
- Whole Milk: 30 ml (about 2 Tbsp), warmed
- Vanilla Extract: 1 tsp
- Salt: a pinch
Whipped Cream Frosting
- Heavy Cream (35% or higher fat): 500 ml (about 2 cups), cold
- Powdered Sugar: 50 g (about 4 Tbsp), sifted
- Vanilla Extract: 1 tsp
Filling & Decoration
- Fresh Strawberries: 400–500 g (about 1 lb), hulled and halved
- Simple Syrup (optional for extra moisture):
- 50 ml water
- 50 g sugar
Equipment You’ll Need
- 2 × 6-inch (15 cm) round cake pans (or 1 × 8-inch, adjusting bake time)
- Electric mixer (stand or handheld)
- Mixing bowls (metal or glass for egg whipping)
- Rubber spatula for folding
- Cooling rack
- Measuring cups and spoons, digital scale (preferred)
- Offset spatula or bench scraper for frosting
- Pastry bag with round tip (optional)
Step-by-Step Preparation
1. Prep and Preheat
- Preheat the oven to 170 °C (338 °F). Place the rack in the middle position.
- Prepare cake pans by lining the bottom with parchment paper circles. Lightly butter the sides and dust with flour, tapping out excess.
- Room-temperature eggs whip to greater volume—remove from fridge at least 30 minutes in advance.
2. Make the Simple Syrup (Optional)
- Combine 50 ml water and 50 g sugar in a small saucepan.
- Heat gently until sugar dissolves, then cool completely.
- This syrup will keep your sponge extra moist, especially helpful in dry climates.
3. Whip the Eggs and Sugar
- In a clean, grease-free bowl, combine eggs and granulated sugar.
- Using an electric mixer on medium-high speed, whip until the mixture is pale, thick, and ribbon-like: when you lift the whisk, it should fall back slowly, forming ribbons that sit on the surface for a few seconds.
- Tip: This step takes about 6–8 minutes with a stand mixer, or 8–10 minutes with a handheld mixer. Patience here yields the lightest sponge.
4. Fold in Dry Ingredients
- Sift cake flour, cornstarch, and salt together.
- Gently fold one-third of the flour mixture into the whipped eggs using a rubber spatula.
- Once partially incorporated, fold in the next third; when almost no streaks remain, add the final third.
- Technique: Use a wide, sweeping motion, rotating the bowl to ensure even mixing. Avoid deflating the batter.
5. Incorporate Butter and Milk
- In a small bowl, whisk melted butter, warm milk, and vanilla extract.
- Temper: Add a couple of spoonfuls of cake batter to the butter mixture to lighten it, then gently fold this mixture back into the main batter until no streaks remain.
- Note: Work quickly but carefully—overmixing collapses the foam structure.
6. Bake the Sponge
- Divide batter evenly between prepared pans.
- Tap pans gently on the counter to remove large air bubbles.
- Bake at 170 °C for 18–22 minutes, or until the cakes spring back when lightly pressed and a skewer inserted in the center comes out clean.
- Rotate halfway through baking for even browning.
7. Cool and Level
- Immediately invert cakes onto a cooling rack. Remove parchment and pans.
- Cool completely—ideally 1 hour—to room temperature.
- If domed, level the tops with a serrated knife for neat stacking.
Preparing the Strawberries
- Wash and hull strawberries carefully to avoid bruising.
- Pat dry on paper towels; moisture can cause them to bleed into the frosting.
- Reserve about 8–10 whole strawberries for decorating the top; slice the rest for filling.
Whipped Cream Frosting
1. Chill Your Tools
- Chill the mixing bowl and beaters for at least 15 minutes. Cold equipment helps achieve stable peaks faster.
2. Whip the Cream
- Combine cold heavy cream, powdered sugar, and vanilla extract in your chilled bowl.
- Beat on medium speed until the mixture thickens, then switch to medium-high.
- Soft Peaks: When the cream holds its shape but still looks glossy.
- Firm Peaks: When peaks stand straight and the cream has a satiny finish. Be careful not to overbeat, or the cream will become grainy and start to separate.
Assembly
1. Layering
- Place one cake layer on your serving plate or cake board.
- Brush lightly with simple syrup if using.
- Spread a thin layer (about 2–3 mm) of whipped cream over the top.
- Arrange a single layer of sliced strawberries, leaving a small border for the cream to seal in the filling.
- Pipe or spread another thin coat of cream over the strawberries to lock them in place.
2. Stacking and Crumb Coat
- Gently place the second sponge layer on top, aligning the edges.
- Apply a crumb coat: a thin layer of whipped cream all around the cake to trap loose crumbs.
- Chill the cake in the refrigerator for 15–20 minutes to set the crumb coat.
3. Final Coat and Smoothing
- Remove the cake from the fridge and apply a thicker, even layer of whipped cream (about 5–7 mm) using an offset spatula.
- Use a bench scraper to smooth the sides, rotating the cake for an even finish.
- Tip: Dip your spatula in warm water, shake off excess, and run it lightly over the frosting for an ultra-smooth surface.
Decoration: The Signature Look
- Whole Strawberries: Arrange reserved berries around the top edge, pointed ends up.
- Piping: Fill a pastry bag with whipped cream, use a round or star tip to pipe small rosettes between strawberries.
- Dusting: Lightly sift powdered sugar over the berries for a “snow-dusted” effect.
- Garnish (optional): Add small sprigs of fresh mint or edible gold leaf for an extra festive touch.
Tips for Perfect Results
- Ingredient Temperatures: Room-temperature eggs and cold cream are key.
- Bowl and Utensil Cleanliness: Any grease or moisture can prevent egg whites from whipping properly.
- Avoid Overmixing: Folding too vigorously deflates the sponge batter.
- Monitoring Bake Time: Ovens vary—start checking at 18 minutes to avoid drying out the cake.
- Frosting Consistency: If your whipped cream loosens while decorating, briefly chill before continuing.
Variations and Flavor Twists
You can adapt the classic Japanese Christmas Cake Recipe with these creative spins:
- Matcha Layer: Replace 10 g of flour with 10 g matcha powder for a green tea-infused sponge.
- Yuzu Syrup: Substitute simple syrup with yuzu juice and sugar to brush the sponge.
- Chocolate Twist: Fold 20 g of cocoa powder into the flour mixture for a subtle chocolate cake.
- Mixed Berry Medley: Swap some strawberries for raspberries or blueberries for varied color and flavor.
- Vegan Adaptation: Use aquafaba (chickpea brine) whipped with sugar in place of eggs, vegan butter, plant-based milk, and coconut cream—though technique adjustments are necessary.
Serving Suggestions
- Presentation: Serve on a pristine white cake stand to highlight the cake’s snowy appearance.
- Accompaniments: Pair with a delicate green tea or champagne to complement the light sweetness.
- Portions: For a 6-inch cake, cut into 8–10 small slices; for larger crowds, double the recipe for an 8-inch pan.
- Timing: Best enjoyed within 24 hours of assembly, while the sponge remains tender and the whipped cream stays fresh.
Make-Ahead and Storage
- Make the Sponge Ahead: Bake and wrap layers tightly in plastic wrap; freeze for up to 1 week. Thaw in the fridge overnight before decorating.
- Whipped Cream: Best used the same day; you may prepare up to 4 hours in advance and refrigerate.
- Assembled Cake: Store in an airtight cake container in the fridge for up to 24 hours. Beyond this, the sponge may become slightly soggy from the cream and fruit.
Troubleshooting FAQs
- Why did my sponge collapse?
Overfolding the batter or opening the oven door early can cause collapse. Always fold gently and wait until the last few minutes to peek. - Why is my whipped cream grainy?
Overbeating causes the cream to separate. Stop as soon as firm peaks form. - How can I prevent bleeding from the strawberries?
Ensure berries are completely dry before layering. Brush a thin coat of cream over the fruit to seal any juice. - Can I use frozen strawberries?
Fresh is best. If using frozen, thaw fully, drain excess liquid, and pat dry—though texture and color may suffer.
Final Thoughts
The Japanese Christmas Cake Recipe is more than just a dessert; it’s a celebration of technique, tradition, and the simple joy of sharing something beautiful with loved ones. From the precise art of whipping eggs to the final dusting of powdered sugar, each step contributes to a cake that’s as delightful to make as it is to eat. Embrace the process, experiment with variations, and most importantly, savor every bite with those who matter most. This holiday season, let your Japanese Christmas cake shine as a testament to time-honored pastry craftsmanship—and may your festive table be filled with warmth, laughter, and slices of this unforgettable treat.
Wishing you a joyful baking adventure and a very Merry Christmas!

Japanese Christmas Cake Recipe
Ingredients
For the Sponge Cake:
- 4 large eggs room temperature
- 120 g granulated sugar
- 100 g cake flour sifted
- 20 g cornstarch sifted
- Pinch of salt
- 30 g unsalted butter melted and slightly cooled
- 30 ml whole milk warmed
- 1 tsp vanilla extract
For the Whipped Cream Frosting:
- 500 ml heavy cream 35%+ fat, cold
- 50 g powdered sugar sifted
- 1 tsp vanilla extract
For the Filling & Decoration:
- 400 –500 g fresh strawberries hulled and halved
- Optional Simple syrup: 50 ml water + 50 g sugar
Instructions
- Preheat & Prep Pans: Preheat oven to 170 °C (338 °F). Line two 6‑inch round cake pans with parchment, butter sides, and dust with flour.
- Whip Eggs & Sugar: In a grease‑free bowl, beat eggs and granulated sugar on medium‑high until pale and ribbon‑stage (6–8 min).
- Fold in Dry Ingredients: Gently fold sifted cake flour, cornstarch, and salt into the egg mixture in three additions, using a rubber spatula to preserve air.
- Add Butter & Milk: Temper melted butter, warm milk, and vanilla by whisking in a few spoonfuls of batter, then fold back into the main batter until combined.
- Bake the Sponge: Divide batter between pans, tap out bubbles, and bake 18–22 min until a skewer comes out clean. Cool inverted on racks.
- Prepare Strawberries: Wash, hull, and pat strawberries dry. Slice most for filling; reserve whole berries for decoration.
- Make Whipped Cream: Chill bowl and beaters. Whip cold cream, powdered sugar, and vanilla on medium to firm peaks—avoid overbeating.
- Assemble Layers: Place one sponge on a cake board. Brush with simple syrup if using. Spread a thin layer of cream, arrange strawberry slices, then seal with another thin cream layer. Top with second sponge.
- Crumb Coat & Chill: Apply a thin “crumb coat” of cream; chill 15 min.
- Final Frosting & Decorate: Frost cake smoothly with remaining cream using an offset spatula. Arrange whole strawberries around the top edge, pipe cream rosettes between, and dust with powdered sugar.
Notes
- Ingredient Temperatures: Ensure eggs are room temperature and cream is cold for optimal whipping.
- Storage: Store the assembled cake in an airtight container in the refrigerator for up to 24 hours; enjoy fresh for best texture.
- Variations: Try folding 10 g matcha into the flour for a green‑tea twist, or swap strawberries for mixed berries.
- Make‑Ahead: Bake sponges up to 1 week ahead; wrap tightly and freeze. Thaw in fridge overnight before decorating.