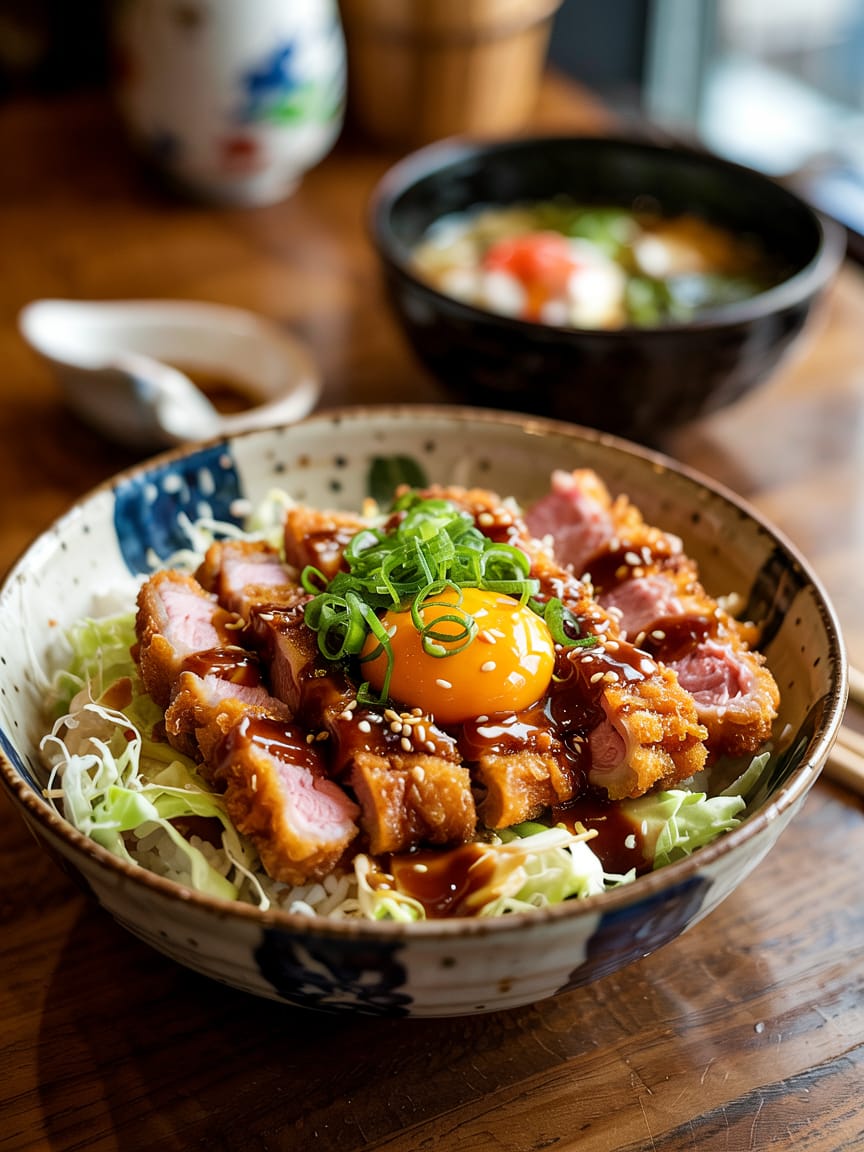
Crispy Japanese Katsu Bowls Recipe
Imagine the snap of golden panko crust giving way to juicy meat, the warm steam rising from perfectly-cooked rice, and a tangy-sweet sauce tying everything together. That’s the joy of the Crispy Japanese Katsu Bowls Recipe — a comfort-food bowl that feels both homey and elevated, fast enough for weeknights but worthy of serving to guests. As a professional chef who’s spent years refining classic Japanese dishes for restaurant and home kitchens, I’ll walk you through every detail: ingredients, technique, plating, make-ahead tips, variations (pork, chicken, tofu, and more), and thoughtful troubleshooting so your katsu always comes out crisp, tender, and delicious.
This post is long because I want you to master the dish — not just follow instructions. Read it through once, then cook. Let’s get into it.
Why this Crispy Japanese Katsu Bowls Recipe works
Katsu (カツ) refers to meat cutlets—most commonly pork (tonkatsu) or chicken (chicken katsu)—coated in panko breadcrumbs and deep-fried until lusciously crisp. A katsu bowl takes that cutlet and places it on a bed of steamed rice with complementary elements: shredded cabbage for crunch and acidity, scallions, fried egg (optional), and tonkatsu sauce. The trick to greatness is technique: dry, hot oil for a golden exterior; panko for the shatteringly light crust; and balance — fat, acid, salt, and sweet — in the sauce.
What you’ll need (equipment & pantry basics)
- Heavy skillet or deep-fryer (cast-iron or stainless) or a Dutch oven; for shallow frying a 10–12-inch skillet works.
- Candy or deep-fry thermometer (essential) — aim for 165–175°C / 330–350°F for frying.
- Wire rack and baking sheet (for draining, not paper towels — they make crust soggy).
- Three shallow bowls or trays for dredging (flour, egg wash, panko).
- Tongs, kitchen shears, meat mallet, and sharp knife.
- Rice cooker or pot with tight-fitting lid for perfect rice.
- Large mixing bowl for coleslaw/cabbage.
- Whisk and small saucepan for homemade sauce (optional).
Ingredients — Serves 4 (full bowl portions)
For the katsu (choose pork, chicken, or tofu):
- 4 boneless pork loin chops (about 5–6 oz / 140–170 g each) or 4 boneless, skinless chicken breasts split horizontally to make cutlets (about 5–6 oz each) or 14–16 oz (400–450 g) firm tofu, pressed.
- Salt and freshly ground black pepper.
- ½ cup (60 g) all-purpose flour.
- 2 large eggs, beaten with 1 tbsp water or milk.
- 2 cups (100 g) panko breadcrumbs (Japanese-style).
- Vegetable oil for frying (canola, peanut, or grapeseed), enough for shallow-deep frying (about 1–1½ inches / 2.5–4 cm in skillet).
For the bowls & sides:
- 3 cups (540 g) uncooked short-grain Japanese rice (or sushi rice) — yields about 6–7 cups cooked.
- 4–5 cups finely shredded green cabbage (or pre-shredded coleslaw mix).
- 1 small carrot, julienned or shredded (optional).
- 2 scallions, thinly sliced.
- 4 soft-boiled or sunny-side-up eggs (optional).
- Sesame seeds for garnish (optional).
- Pickled ginger or Japanese takuan (pickled daikon) — optional.
For quick homemade tonkatsu sauce (makes about 1 cup):
- ½ cup ketchup.
- 3 tbsp Worcestershire sauce.
- 2 tbsp soy sauce.
- 2 tbsp mirin or rice vinegar.
- 1½ tbsp brown sugar (adjust to taste).
- 1 tsp Dijon mustard (optional for brightness).
- Pinch of garlic powder and onion powder.
Chef’s notes:
- For gluten-free: use rice flour instead of AP flour and gluten-free panko.
- For extra richness: brush cutlets with a light layer of melted butter right after frying. (Not traditional but restaurant-level delicious.)
Prep work: the difference between rushed and restaurant-quality
The single most important thing you can do before frying is prep. Have everything laid out (mise en place): rice cooked and warm, dredging stations ready, oil heated, cabbage shredded, sauce whisked, and bowls warmed. Frying waits for no one — once the oil is ready you need to move fast and confidently.
Rice — Wash the rice until water runs clear (2–3 rinses), then soak 20–30 minutes if you have time. Cook in rice cooker or simmer with tight lid for 15–18 minutes then rest 10 minutes off heat.
Meat — If using pork: trim fat to about ¼ inch, then score lightly at the edges so they cook evenly and don’t curl. For chicken: butterfly or slice breasts into even cutlets. Use a meat mallet to pound to an even ½ inch thickness — this ensures uniform cooking and tenderness. Salt and pepper both sides lightly and let rest 10 minutes (or up to 30 minutes).
Tofu — Press firmly for 30 minutes, slice into ½-inch slabs, pat dry. Lightly dust with flour so the egg adheres.
Dredging station — One plate with flour seasoned with a pinch of salt and pepper; one bowl with beaten eggs; one plate with panko. For panko: spread on a sheet pan and press lightly with hands to get some coarse and some fine crumbs for better texture.
Step-by-step: How to make the katsu — crisp, even, and juicy
- Season and flour: Lightly season cutlets with salt & pepper. Dredge in flour, shaking off excess. The flour layer gives the egg something to cling to.
- Egg wash: Dip into the beaten eggs — ensure full coverage. Let excess drip back into bowl.
- Panko coat: Press into panko generously, covering all sides. Don’t rub too hard or you’ll compact the crumb. Aim for a thick but airy coating. For extra adhesion and crunch, do a double-dip: egg → panko → egg → panko (this yields a very substantial crust, great for thicker cuts).
- Rest: Place coated cutlets on a wire rack for 10 minutes. This helps the coating set — fewer fallen crumbs in the oil.
- Heat oil: Heat oil in a skillet or Dutch oven to 165–175°C / 330–350°F. Test with a small breadcrumb — it should sizzle immediately and float to the surface.
- Fry: Gently add cutlets, don’t overcrowd. Fry for 3–4 minutes per side for thin chicken/pork cutlets (thicker chops may take 4–5 minutes per side). Use tongs and a spatula to maintain even contact. Maintain oil temperature — if it drops too low, crust becomes greasy.
- Drain properly: Transfer to a wire rack set over a baking sheet (NOT paper towels) to drain. This keeps the underside crisp.
- Rest before slicing: Let rest 3–4 minutes; slice against the grain into 6–8 slices. Resting retains juices and prevents steam from making the crust soggy.
Assembly: Building the perfect katsu bowl
- Spoon warm steamed rice into each bowl (about 1–1¼ cups cooked rice per bowl). Lightly fluff with fork or rice paddle.
- Make a bed of shredded cabbage on one side or scatter lightly over the rice. Add a small mound of pickles if using.
- Place sliced katsu across the rice. Drizzle 1–2 tbsp of tonkatsu sauce over the cutlet, or serve sauce on the side for dipping.
- Add soft-boiled or fried egg, sprinkle scallions and sesame seeds over the bowl. Finish with a light dusting of shichimi togarashi (optional) for heat.
- Serve immediately with extra sauce and lemon wedges for brightness.
Tonkatsu sauce — restaurant-style, quick and balanced
Store-bought tonkatsu sauce is excellent and convenient (look for “tonkatsu sauce” or “Bulldog sauce”). If you want to make it at home, whisk these together in a small saucepan, simmer 2–3 minutes until sugar dissolves, then cool:
- ½ cup ketchup
- 3 tbsp Worcestershire sauce
- 2 tbsp soy sauce
- 2 tbsp mirin or rice vinegar
- 1½ tbsp brown sugar
- 1 tsp Dijon mustard
- Pinch garlic & onion powder
Adjust sweetness or acidity to taste. This sauce stores in the refrigerator for up to 2 weeks.
Flavor profile & balancing elements
- Crisp texture from panko — light, airy, shatters when bitten. Use fresh panko; stale crumbs make a heavy crust.
- Juicy protein — even cooking and resting preserve juices. Pork loin can dry if overcooked; aim for 62–65°C / 145–150°F internal. Thin chicken cutlets cook quickly — no need to overcook.
- Acid from pickles or a squeeze of lemon cuts richness.
- Sweet-savory sauce binds the bowl together.
- Crunch & freshness from cabbage avoids monotony and cleanses the palate.
Chef’s troubleshooting and advanced tips
- Greasy crust? Oil was too cool or cutlets overcrowded. Always maintain temperature and fry in batches. Drain on a wire rack, not paper towels.
- Panko falls off? Ensure proper seasoning and that the flour layer and egg wash were applied correctly. Let the crumb set on a rack before frying. Lightly press crumbs but don’t compact.
- Crust browns too fast before meat cooks? Oil too hot — lower to 160–170°C and fry slightly longer. For thicker cuts, sear briefly, then finish in a 180°C oven for a few minutes.
- Soggy bottom? Don’t slice immediately; resting reduces steam. Serve on warm bowls but avoid covering bowls until served.
Variations — make it your own
Classic Pork Tonkatsu Bowl — Use 1-inch pork loin chops, brined briefly (2% salt by weight in water for 30 minutes) for extra tenderness and seasoning. Finish with a light brush of tonkatsu sauce.
Chicken Katsu Bowl — Use thin, evenly pounded chicken breasts. Slightly shorter fry time. Favorite option for lunch or kids.
Tofu Katsu Bowl (Vegetarian) — Use extra-firm tofu, press well, and coat exactly like meat. Serve with a vegetarian tonkatsu sauce (omit Worcestershire or use a vegan variety). Add sautéed shiitake mushrooms for umami.
Seafood Katsu Bowl — Try katsu with firm white fish fillets (cod) or large prawns. Fry briefly — 2–3 minutes depending on thickness.
Spicy Katsu Bowl — Mix sriracha into the tonkatsu sauce or sprinkle shichimi togarashi on top. Add a quick kimchi slaw for heat and tang.
Keto/Low-Carb Option — Use crushed pork rinds or almond flour seasoned and toasted for coating; serve on cauliflower rice and skip the sweet sauce (use sugar-free tamari + mustard + vinegar base).
Side dishes, accompaniments, and serving suggestions
- Miso soup: A light miso soup with wakame and tofu pairs beautifully and keeps the meal balanced.
- Pickled vegetables: Quick cucumber or daikon pickles add brightness.
- Japanese potato salad: Creamy potato salad complements the crunchy katsu.
- Edamame: Lightly salted steamed edamame is a clean, easy starter.
- Cold soba or cucumber salad: Works well if you want a lighter counterpoint.
Make-ahead, storage, and reheating (yes, you can enjoy leftovers)
Make-ahead: You can bread the cutlets and refrigerate for up to 6 hours before frying. Cooked katsu is best eaten the same day, but leftovers keep 2 days in the fridge.
Storage: Store cutlet (sliced) and rice separately in airtight containers in the refrigerator. Keep sauce in a small jar.
Reheat: For best texture, reheat in a 180°C / 350°F oven on a wire rack for 6–8 minutes until warmed through and crisp. Avoid the microwave — it ruins the crust.
Nutrition & portioning
A typical Crispy Japanese Katsu Bowls Recipe (pork or chicken) bowl with rice, cabbage, sauce, and egg will be moderate-to-high in calories due to frying and rice. To lighten: use thinner cutlets, serve smaller rice portions, or substitute brown rice or cauliflower rice. Protein yields around 25–35 g per serving depending on cut.
Pairing beverages
- Beer: A crisp lager or pilsner complements the crunchy, fatty katsu.
- Sake: A cold, dry ginjo is a lovely match.
- Green tea: Hot or cold green tea cleanses the palate beautifully.
- Light white wine: A dry Riesling or Sauvignon Blanc balances richness.
Presentation & plating like a pro
- Use a shallow bowl so the cutlet is visible. Place rice on one side, cabbage on the other, then fan-slice katsu on top. Drizzle sauce in a zig-zag pattern and finish with scallions and toasted sesame seeds. A whole soft fried egg or two halves of a soft-boiled egg make the dish feel luxurious.
Common regional twists & cultural notes
While tonkatsu is quintessentially Japanese and widely enjoyed, regional touches appear: Kyoto-style may favor lighter flavors, while Kansai restaurants might present thicker cuts. The concept of a katsu bowl (katsudon) traditionally involves simmering slices in a soy-sweet broth with onion and egg — the Crispy Japanese Katsu Bowls Recipe I present keeps the katsu crisp and pairs it with rice and slaw for textural contrast rather than the softer, simmered katsudon style.
Final checklist for success
- Rice washed and cooked; warm.
- Cutlets evenly pounded to ½ inch for uniform cooking.
- Dredging station set with flour → egg → panko.
- Oil at 165–175°C; thermometer ready.
- Wire rack to drain; keep hot oven (90–100°C) if making multiple batches to keep warm.
- Tonkatsu sauce ready and tasted.
- Garnishes prepped: scallions, sesame seeds, pickles.
Sample cooking timeline for a 4-person meal (efficient workflow)
- Start rice (30–40 minutes including soak and rest).
- While rice cooks, shred cabbage and prep sauce (10 minutes).
- Pound and season cutlets; set up dredging station (10 minutes).
- Heat oil, fry cutlets in batches (total active frying time ~20–25 minutes).
- Rest and slice cutlets, assemble bowls, garnish, serve.
Final thoughts from the chef
The Crispy Japanese Katsu Bowls Recipe is a lesson in contrasts — crunchy and tender, rich and bright, simple and sophisticated. With careful prep, attention to oil temperature, and a fresh panko crust, you’ll create bowls that are visually stunning and deeply satisfying. Don’t be afraid to tweak small elements (a touch more acidity in the sauce, a different pickle) to match your palate — that’s what home cooking is for.
Crispy Japanese Katsu Bowls Recipe
Ingredients
For the Katsu (choose pork, chicken, or tofu):
- 4 boneless pork loin chops or chicken breasts 5–6 oz each or 14–16 oz firm tofu, pressed
- Salt and black pepper to taste
- ½ cup all-purpose flour
- 2 large eggs beaten with 1 tbsp water
- 2 cups panko breadcrumbs
- Vegetable oil for frying
For the Bowls:
- 3 cups uncooked short-grain Japanese rice
- 4 –5 cups shredded green cabbage
- 1 small carrot shredded (optional)
- 2 scallions sliced
- 4 eggs soft-boiled or fried (optional)
- Sesame seeds for garnish
- Pickled ginger or Japanese pickles optional
For the Homemade Tonkatsu Sauce:
- ½ cup ketchup
- 3 tbsp Worcestershire sauce
- 2 tbsp soy sauce
- 2 tbsp mirin or rice vinegar
- 1½ tbsp brown sugar
- 1 tsp Dijon mustard optional
- Pinch garlic and onion powder
Instructions
- Cook the rice: Rinse rice until water runs clear. Cook using a rice cooker or stovetop, then keep warm.
- Prepare protein: Pound pork or chicken cutlets to ½-inch thickness. Season both sides with salt and pepper. For tofu, slice and pat dry.
- Set up dredging station: Prepare three shallow bowls — one with flour, one with beaten eggs, and one with panko breadcrumbs.
- Coat cutlets: Dredge each cutlet in flour, then dip into egg, and finally press into panko until fully coated. Let rest for 10 minutes.
- Heat oil: In a deep skillet, heat oil to 165–175°C (330–350°F).
- Fry: Cook cutlets 3–4 minutes per side until golden brown and crisp. Drain on a wire rack.
- Make the sauce: Whisk all sauce ingredients in a small saucepan. Simmer 2–3 minutes, then cool.
- Assemble bowls: Scoop rice into bowls, top with shredded cabbage, sliced katsu, and drizzle tonkatsu sauce. Garnish with scallions, sesame seeds, and a soft-boiled egg if desired.
Notes
- Tip: Always drain fried katsu on a wire rack, not paper towels, to keep it crispy.
- Storage: Store leftovers in airtight containers. Reheat in a 180°C (350°F) oven for 6–8 minutes to restore crispiness.
- Variations: Try tofu or fish for a lighter version. Add a spicy mayo drizzle for extra flavor.
- Make-ahead: Bread the cutlets up to 6 hours ahead and refrigerate until frying.